【Unity】敵機と自機の爆発用画像を用意する。【GIMP】
今回は、敵機と自機の爆発用画像をGIMPを使って加工します。
GIMPの「フィルター」→「ノイズ」→「拡散」で爆発したような感じの画像を、値を変えて3種類作ります。
元の画像と併せて4種類の画像で爆発みたいな表現ができればと思っています。
○敵機(Circle)
値:0 ※元ファイル

値:32
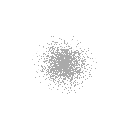
値:64
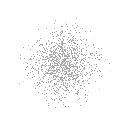
値:128
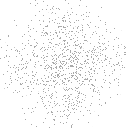
○自機(Diamond)
値:0 ※元ファイル

値:32

値:64
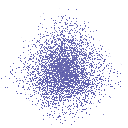
値:128
これらを連続して表示させます。
Unityへの設定とスクリプトは次回で。
今回はここまでです。
【Unity】敵機と弾の衝突判定を行い、敵機を消滅させる。
変更:
2022/01/25 変数名を"アッパーキャメル"から、すべて小文字に修正。
今回は、敵機と弾の衝突判定を行い、敵機を消滅させます。
前回、前々回、"Rigidbody"と"Collider"を使って、"Boundary"外に出たGameObjectを消滅させました。
同じやり方で衝突判定をして、敵機と当たった弾の両方を消そうと試みたのですが、どうもうまくいきません、
BulletPreFabController.cs(弾)やCirclePerFabController.cs(敵機)にDestroyを記述しても、敵機と弾を消滅させることができても、"Boundary"外に出た敵機が消えなくなったり、初めにスペースキーを押したら、一度ゲーム画面上の敵機と弾が消えてしまったりと思うような動きをしてくれませんでした。
GameObjectとしか指定できていないので、対象の判別があいまいになりきちんと動かないのではと推測しました。
色々調べるなかで、"Tag"を使う方法に行き当たりました。
今回はその"Tag"を各GameObjectを識別し、確実の対象を操作できるようにしてみます。
1.各GameObjectに"Tag"を設定する。
これは各インスペクターに項目があります。
"Player"など、いくつかすでに用意されているTagもありますが、用意されていないものは追加します。
2.敵機(CirclePreFab)のトリガーにチェックを入れます。
3.CirclePerFabController.cs(敵機)にTag識別による分岐でDestroyを記述します。
※OnTriggerExit2D と似た OnTriggerEnter2D(触ったら発動)を使います。
//追記
private void OnTriggerEnter2D(Collider2D collision)
{
if (collision.gameObject.CompareTag("Bullet")) //Tagが"Bullet"だったら
{
Destroy(collision.gameObject); //ぶつかったもの(Bullet)
Destroy(gameObject); //gameObject:自分(Circle)自身
}
}
CirclePreFabController,cs
using System.Collections;
using System.Collections.Generic;
using UnityEngine;public class CirclePreFabController : MonoBehaviour
{
// Start is called before the first frame update
void Start()
{
}// Update is called once per frame
void Update()
{
transform.position += new Vector3(
0f,
-0.5f * Time.deltaTime,
0f
);
}
//追記
private void OnTriggerEnter2D(Collider2D collision)
{
if (collision.gameObject.CompareTag("Bullet")) //Tagが"Bullet"だったら
{
Destroy(collision.gameObject); //ぶつかったもの(Bullet)
Destroy(gameObject); //gameObject:自分(Circle)自身
}
}}
前回から変更
GameController.cs
using System.Collections;
using System.Collections.Generic;
using UnityEngine;public class GameController : MonoBehaviour
{
//追加
//敵機をGameObjectとして宣言する
public GameObject circleprefab; //変更// Start is called before the first frame update
void Start()
{
//追加
//GenerateCircle()を開始する
StartCoroutine("GenerateCircle");
}// Update is called once per frame
void Update()
{
}//追加
//敵機(Circle)を生成する
IEnumerator GenerateCircle()
{
while (true)
{
Instantiate(
circleprefab, //変更
//X軸方向はランダム、Y軸方向6.0f、Z軸方向0.0fに敵機を生成
new Vector3(Random.Range(-8.5f, 8.5f), 6.0f, 0.0f),
transform.rotation
);
//1秒ごとに実行する。
//yield return new WaitForSeconds(1.0f);
//変更
yield return new WaitForSeconds(Random.value * 2.0f);
}
}}
今回は以上となります。
【Unity】敵機をPreFab化して大量生成する。
変更:
2022/01/25 変数名を"アッパーキャメル"から、すべて小文字に修正。
今回は、UnityのPreFab機能を使って敵機を生成し、大量に落下させます。
ここでは弾の発射Shot()関数で使った"Instantiate"を使うとともに、"コルーチン"という機能を使います。
Unityマニュアルより:
コルーチンとは、実行を停止して Unity へ制御を戻し、その次のフレームで停止したところから続行することができる関数です。
正直なところ私もよくわかっていませんが、時間指定して繰り返したい処理があるときに
・IEnumerator
・StartCoroutine 関数
・WaitForSeconds 関数
などを使えばよいようです。
Update関数内に処理を書き込んでも繰り返し処理は出来ますが、毎フレームごとに実行する必要のないものだと困ります。
敵機(Circle)をPreFab化すると"ヒエラルキー"上から消すことになります。
どこかから呼び出さねばなりません。
そのための受け皿として、"ヒエラルキー"上に"空のオブジェクト"を作成し、"GameController"と名前を付けました。
これにスクリプトを追加し、GameObjectとして敵機(Ciecle)を呼び出します。
GameController.cs
using System.Collections;
using System.Collections.Generic;
using UnityEngine;public class GameController : MonoBehaviour
{
//追加
//敵機をGameObjectとして宣言する
public GameObject circleprefab; //変更// Start is called before the first frame update
void Start()
{
//追加
//GenerateCircle()を開始する
StartCoroutine("GenerateCircle");
}// Update is called once per frame
void Update()
{
}//追加
//敵機(Circle)を生成する
IEnumerator GenerateCircle()
{
while (true)
{
Instantiate(
circleprefab, //変更
//X軸方向はランダム、Y軸方向6.0f、Z軸方向0.0fに敵機を生成
new Vector3(Random.Range(-8.5f, 8.5f), 6.0f, 0.0f),
transform.rotation
);
//1秒ごとに実行する。
yield return new WaitForSeconds(1.0f);
}
}}
また、"CircletPreFab"には"BulletPreFab"を参考に、"Rigidbody 2D"、"Circle Collider 2D"を設定してください。
"Boundary"外に出ると、敵機(Ciecle)を消すようにします。
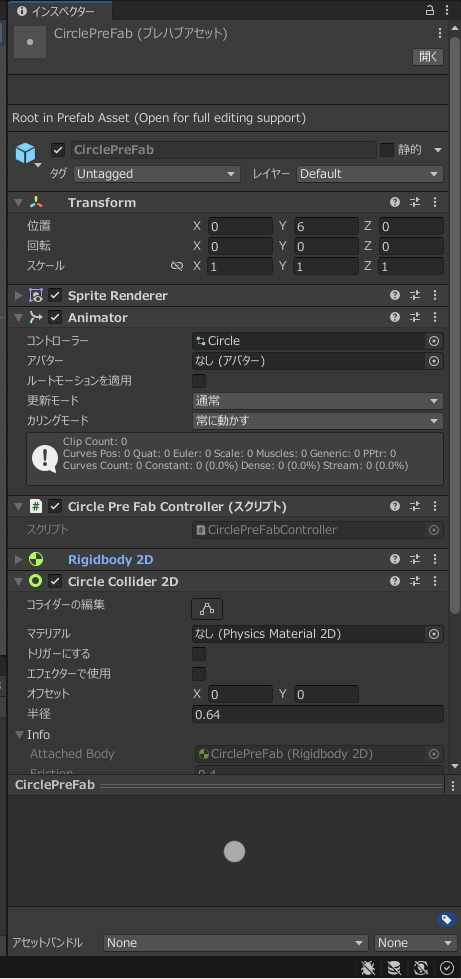
さらに、CircleController.cs→CirclePreFabController.cs
それに伴い、ファイル内も変更してください。
CirclePreFabController.cs
public class CirclePreFabController : MonoBehaviour
以下略
次回は、”衝突判定”を設定して、敵機を弾で撃ち落とす処理を予定しています。
では、また。
【Unity】ゲーム画面外に飛び出た弾を消す
変更:
2022/01/25 変数名を"アッパーキャメル"から、すべて小文字に修正。
前回、UnityのPreFab機能を使って大量の弾を生成し、スペースキーを叩く度に発射するプログラムを作成しました。
しかし、生成された弾はどこまでも飛んで行き、ゲームのメモリー上に残ってしまいます。
弾を消す(メモリーを開放する)方法を考えます。
以下の2通りを試します。
その1:Y軸方向に一定以上離れた弾を破壊(メモリーの開放)する
"BulletController.cs"のUpdate()関数に以下を追加します。
if (transform.position.y > 6)
{
Destroy(gameObject);
}
※いきなり出てきている"gameObject"ですが、Unityの概念として、このゲーム内のすべての"gameObject"を指し示していると理解しています。
※単純で分かりやすい方法です。
スクリプトを保存し、ゲームを実行してみてください。
ヒエラルキー上に残っていた"Bullet(clone)"が、弾がゲーム画面から出ると消えるのが確認できすはずです。
これでも十分、実用に耐えます。
確認が終わったら、次の方法を試すため、追加した部分はコメントアウトしておいてください。
BulletPreFabController.cs
using System.Collections;
using System.Collections.Generic;
using UnityEngine;public class BulletPreFabController : MonoBehaviour
{
// Start is called before the first frame update
void Start()
{
}// Update is called once per frame
void Update()
{
//BulletPreFabの位置を1Sec毎に1fだけ+Y方向(上)に動かす
transform.position += new Vector3(
0f,
1f * Time.deltaTime,
0f
);
//追加:Y軸方向に一定以上離れた弾("gameObject")を破壊(メモリーの開放)する
if (transform.position.y > 6)
{
Destroy(gameObject);
}
}
}
その2:必要な各"gameObject"に、"Box Collider 2D"、"Rigidbody 2D"、"Capsule Collider 2D"を設定し、メソッド?"OnTriggerExit2D"を使い衝突判定を行います。
※ほかに"OnTriggerEnter2D"、"OnTriggerStay2D"というメソッドもあります。"Collider"と、"接触"したとき、"接触"中、"離れた"ときというように使い分けるようです。
1)"空のオブジェクト"をヒエラルキー状に新規作成します。
"Bounds(境界、果て)"という概念が"Collider"にあるので、"Boundary(境界)"という名前にします。
2)"コンポーネントの追加"より、"Box Collider 2D"を追加します。
"トリガーにする"にチェックを入れ、"サイズ"はほぼゲーム画面に合わせました。
一旦ゲーム画面の外に飛び出してもまた戻ってくるような動きをするオブジェクト(弾や敵機など)があれば、少し大きめにしてもよいと思います。
3)"コンポーネントの追加"より、"BoundaryController"を追加します。
名前は区別がつけば何でもよいです。今回はスクリプトを初めのほうで"~~Controllerとする"という勝手に決めた命名規則にしたがいました。
以下の一文を、void Start()の前に挿入します。
private void OnTriggerExit2D(Collider2D collision)
{
Destroy(collision.gameObject);
}
BoundaryController.cs
using System.Collections;
using System.Collections.Generic;
using UnityEngine;public class BoundaryController : MonoBehaviour
{
//追加:"Boundary"から出て行った"gameObject"をDestroy(破壊=メモリーの開放)する。
private void OnTriggerExit2D(Collider2D collision)
{
Destroy(collision.gameObject);
}
// Start is called before the first frame update
void Start()
{
}// Update is called once per frame
void Update()
{
}
}
4)PreFabsフォルダー内の"Bullet.prefab(プレハブアセット)"の"インスペクター"に"コンポーネントの追加"より、"Rigidbody 2D"を追加します。
"ボディタイプ"を"キネマティック"(物理演算を使う場合は"ダイナミック"を使うようです)に変更します。
5)同じく"コンポーネントの追加"より、"Capsule Collider 2D"を追加します。
"Collider"の設定画面に遷移するので、(しない場合はPreFabsフォルダー内の"Bullet"をダブルクリック)"サイズ"を適当な大きさに変更します。
今回は、"X->0.2,Y->0.5"に設定しました。
※こちらのほうがUnityの機能をうまく使っていて、各gameObjectのスクリプト(コード)をいじらずに済みますね。
汎用性が高く、ゲーム構成の見通しが良くなるように思います。
今回はここまでです。
一歩一歩、進めて行きたいと思います。
ではでは。
【Unity】PreFab機能を使って弾を撃つ
変更:
2022/01/25 変数名を"アッパーキャメル"から、すべて小文字に修正。
今回はUnityのPreFab機能を使って、弾を生成し、スペースキーを叩く度に発射するプログラムを作成します。
Unityのプレハブ機能とObject.Instantiate関数を使います。
上記の動画にあるように、”Bullet”をプロジェクトに追加、プレハブ化して下記のスクリプトを”追加・作成”します。
BulletPreFabController.cs (cord)
using System.Collections;
using System.Collections.Generic;
using UnityEngine;public class BulletPreFabController : MonoBehaviour
{
// Start is called before the first frame update
void Start()
{
}// Update is called once per frame
void Update()
{
//BulletPreFabの位置を1Sec毎に1fだけ+Y方向(上)に動かす
transform.position += new Vector3(
0f,
1f * Time.deltaTime,
0f
);
}
}
※移動の部分は敵機の動きと帆も同じ。向きとスピードを変えているだけです。
次にプレーヤー機(Diamond)のスクリプトに、”スペースキーを叩く度に弾を発射する”記述を追記します。
DiamondController.cs
using System.Collections;
using System.Collections.Generic;
using UnityEngine;public class DiamondController : MonoBehaviour
{//追加
//GameObjectの宣言
//Unityで使うオブジェクトは"GameObject"クラスになります。
//public宣言すると、GUIエディターに"Diamond"のインスペクターに"BulletPreFab"の項目ができます。(動画を参照)public GameObject bulletprefab; //修正
// Start is called before the first frame update
void Start()
{
}// Update is called once per frame
void Update()
{
float dx = Input.GetAxis("Horizontal") * Time.deltaTime * 4f;
float dy = Input.GetAxis("Vertical") * Time.deltaTime * 4f;transform.position = new Vector3(
Mathf.Clamp(transform.position.x + dx, -8.5f, 8.5f),
Mathf.Clamp(transform.position.y + dy, -4.5f, 4.5f),
0f
);//追加
//Spaceキーを叩くたびに"Shoot()"関数を呼び出す。
//キーの指定を変えれば、Spaceキーでなくてもよい。
if (Input.GetKeyDown(KeyCode.Space)){
Shoot();
}
}//追加
//弾を撃つ関数private void Shoot()
{
//Diamond(Player機)の中心位置から撃つ
Instantiate(bulletprefab, transform.position, transform.rotation); //修正
}
}
UnityのGUIエディター上で、"BulletPreFab"をインスペクターの欄にドラッグ&ドロップで追加、スクリプトをアタッチします。
さらにプレイヤー機のスクリプトにスペースキーを叩く度、弾を発射する機能を追加します。
動画の解説と併せて見てください。
ではでは。
【Unityを使った”2Dシューティングゲームの作成(プログラム編その2)】
今回は”敵機”を動かすプログラムを作成します。
単純に、初期位置(0,6,0)から真下へ、敵機が移動するだけのプログラムです。
Unityでは”敵機”や”弾”のような、動的に大量に生成し消費(破壊)されるようなGameObjectは、”PreFab(プレハブ)”という機能を使います。
今回はとりあえず、”敵機”が真下へ移動するプログラムを紹介します。
Unityのエディター(GUI)で敵機(Circle)に以下のコードを”追加・作成”します。
プログラム:(CircleController.cs)
using System.Collections;
using System.Collections.Generic;
using UnityEngine;
public class CircleController : MonoBehaviour
{
// Start is called before the first frame update
void Start()
{
}// Update is called once per frame
void Update()
{
transform.position += new Vector3(
0f,
-0.5f * Time.deltaTime,
0f
);
}
}
プログラムとして書いたのは、
transform.position += new Vector3(
0f,
-0.5f * Time.deltaTime,
0f
);
の部分、実質一行だけです。
1フレームごとに実行される”void Update”の中に、”-y方向に0.5f/sec移動しなさい(+=)”という命令を書いています。
Unityでは、GameObjectのプロパティはGUIのエディターで指定できるので、C#のスクリプト(プログラム)は”やりたいことだけ”記述すればよいので、非常に簡単に動作させることができます。
簡単ですが、今回はこれまで。
ではまた。
【Unity】プレイヤー機を動かす(プログラム編その1)
今回は”プレーヤー機”をキーボードで動かすプログラムを作成します。
"Input.GetKey"と"Input.GetAxis"の両方を使ってプログラムを書いてみます。
最終的にプレイヤー機の移動には、"Input.GetAxis"を使います。
"Input.GetKey"は移動以外にも、何か動作をさせるのに使えます。
後に弾を発射するのに使う予定です。
This time, I will create a program to move the "player machine" with the keyboard.
Let's write a program using both "Input.GetKey" and "Input.GetAxis".
Finally, use "Input.GetAxis" to move the player machine.
"Input.GetKey" can be used to do something other than move.
I plan to use it to fire bullets later.
☆ Information is also disclosed on my blog.
https://norablog-tech.hatenablog.com/
【Unityを使った”2Dシューティングゲームの作成(プログラム編その1)】
今回は”プレーヤー機”をキーボードで動かすプログラムを作成します。
プレイヤー機をプログラムで動かすためには、キー入力とプレーヤー機を結び付けてやる必要があります。
代表的と思われる2つのプログラムを紹介します。
This time, I will create a program to move the "player machine" with the keyboard.
In order to operate the player machine programmatically, it is necessary to connect the key input and the player machine.
Here are two programs that seem to be representative.
0.インスペクターでプレイヤー機にスクリプトを”追加”します。
今回は"DiamondController"をいう名前をつけました。
今後何かをコントロールする場合は"--Controller"という名称に統一します。
0. "Add" the script to the player machine in the Inspector.
This time, I named it "Diamond Controller".
When controlling something in the future, the name will be unified to "--Controller".
1."Input.GetKey"を使用する。
個々のキーに動作を割り当てる。
移動以外にもいろいろな動作にキーを割り当てることができる。
※Unityでは移動の指定は省略していても、常に"f(フロート)"です。
※移動量は各自調整してください。
1. Use "Input.GetKey".
Assign actions to individual keys.
Keys can be assigned to various actions other than movement.
* In Unity, even if the move specification is omitted, it is always "f (float)".
* Please adjust the amount of movement by yourself.
コード(code):
using UnityEngine;
using System.Collections;public class DiamondController : MonoBehaviour
{
// Start is called before the first frame update
void Start()
{
}// Update is called once per frame
//"transform.Translate":ローカル座標(現在位置からの”相対的”位置の増減)
//"Time.deltaTime":現在のフレームと前のフレームの間の時間を提供。
//GameObjectを1秒あたりの単位でその方向に移動します。
//"transform.position.x(y)":現在のx,y座標
//"Vector3":3D ベクトルと位置の表現
//Unity全体で3Dの位置と方向を渡すために使用。画面からはみ出さないように制御。// "transform.Translate": Local coordinates (increase / decrease "relative" position from current position)
// "Time.deltaTime": Provides the time between the current frame and the previous frame.
// Move the GameObject in that direction in units of seconds.
// "transform.position.x (y)": current x, y coordinates
// "Vector3": 3D vector and position representation
// Used to pass 3D position and orientation throughout Unity. Control so that it does not protrude from the screen.void Update()
{
//矢印キーにX軸,Y軸方向の移動を割り当てる。Z軸方向は常に"0"
if (Input.GetKey(KeyCode.LeftArrow))
{
transform.Translate(-2.0f * Time.deltaTime, 0, 0);
if (transform.position.x < -8.5f)
{
transform.position = new Vector3(-8.5f, transform.position.y, 0);
}
}
if (Input.GetKey(KeyCode.RightArrow))
{
transform.Translate(2.0f * Time.deltaTime, 0, 0);
if (transform.position.x > 8.5f)
{
transform.position = new Vector3(8.5f, transform.position.y, 0);
}
}
if (Input.GetKey(KeyCode.UpArrow))
{
transform.Translate(0, 2.0f * Time.deltaTime, 0);
if (transform.position.y > 4.5f)
{
transform.position = new Vector3(transform.position.x, 4.5f, 0);
}
}
if (Input.GetKey(KeyCode.DownArrow))
{
transform.Translate(0, -2.0f * Time.deltaTime, 0);
if (transform.position.y < -4.5f)
{
transform.position = new Vector3(transform.position.x, -4.5f, 0);
}
}
}
}
2."Input.GetAxis"を使う。
ジョイスティック、ゲームパッド、キーボード、マウスを利用できる。
※Unityでは移動の指定は省略していても、常に"f(フロート)"です。
※移動量は各自調整してください。
2. Use "Input.GetAxis".
You can use the joystick, game pad, keyboard, and mouse.
* In Unity, even if the move specification is omitted, it is always "f (float)".
* Please adjust the amount of movement by yourself.
コード(code):
using System.Collections;
using System.Collections.Generic;
using UnityEngine;public class PlayerScript : MonoBehaviour
{
// Start is called before the first frame update
void Start()
{
}// Update is called once per frame
//"Input.GetAxis":Horizontal と Vertical: w、a、s、d と矢印キー
//"Time.deltaTime":現在のフレームと前のフレームの間の時間を提供。
//GameObjectを1秒あたりの単位でその方向に移動します。
//"Mathf.Clamp":与えられた最小 float 値と最大 float 値の範囲に値を制限します。
//"transform.position":3D world space.(ワールド座標:画面内の絶対的位置)// "Input.GetAxis": Horizontal and Vertical: w, a, s, d and arrow keys
// "Time.deltaTime": Provides the time between the current frame and the previous frame.
// Move the GameObject in that direction in units of seconds.
// "Mathf.Clamp": Limits the value to the range of given minimum and maximum float values.
// "transform.position": 3D world space. (World coordinates: absolute position in the screen)void Update()
{
float dx = Input.GetAxis("Horizontal") * Time.deltaTime * 8f;
float dy = Input.GetAxis("Vertical") * Time.deltaTime * 8f;transform.position = new Vector3(
Mathf.Clamp(transform.position.x + dx, -9f, 9f),
Mathf.Clamp(transform.position.y + dy, -5f, 5f),
0f
);
}
}
3.各クラス、メソッドに関しては、Unityのスクリプトリファレンスを参照してください。(これ重要です)
3. For each class and method, refer to Unity script reference. (This is important)
4."Input.GetAxis"を使う方が、明らかにコードが短く、シンプルなので、こちらを採用。
4. Using "Input.GetAxis" is obviously shorter and simpler, so I chose this one.
ではまた。
see you.